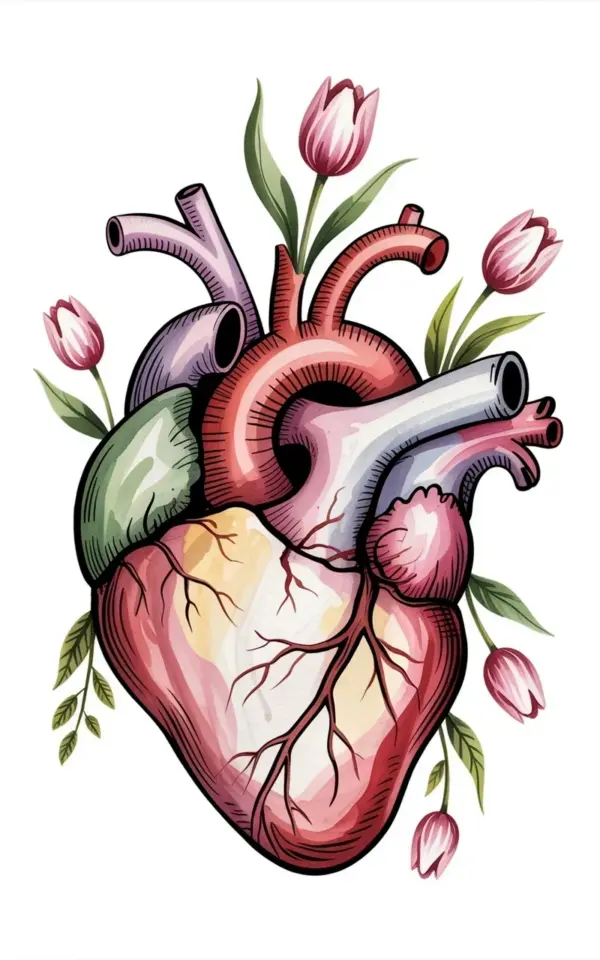
The idea of painting a human heart on a crisp sheet of watercolor paper might sound a bit intense for Valentine’s Day. But when you see that heart cracked open with soft pink tulips spilling out, it suddenly makes perfect sense. This anatomical heart watercolor painting with tulips is the kind of drawing idea that feels both moody and romantic, and honestly, it looks way harder to pull off than it actually is. You don’t need a medical degree or a studio full of expensive gear to make it work, which is exactly why I wanted to break down how to recreate it without breaking your wallet.
I found this specific sketchbook inspiration pinned as a watercolor heart tutorial of sorts, showing the chambers and arteries softened by beige washes and outlined with thin black lines. The beauty is in the balance, the deep red cracks against the gentle green stems, the clinical detail softened by those delicate petals. If you are staring at your own blank page wondering where to start, I have got you covered with some real, budget friendly steps and product swaps that actually hold up.
Choosing Affordable Watercolor Supplies That Still Look Professional
Look, you do not need a $80 set of artist grade paints to get those rich crimson tones and soft pink washes. A basic pan set with at least twelve colors will do the trick, especially if it includes a dark red, a warm pink, and a decent green. I have personally used the inexpensive tubes from craft stores for years, and the secret is just learning how much water to add.
Here is the thing about paper, it matters more than the paint. If your paper buckles and pills, all that detail work with the veins and chambers will turn into a muddy mess. Head to your local art supply store and look for a pad of 140 lb cold press paper; the store brand is usually perfectly fine for practice. For brushes, a round size 6 and a tiny size 0 for the black linework will cover almost every part of this floral art project.
A quick list of what you will need, all of which you can find on a tight budget:
- A basic watercolor pan set (look for one with a deep crimson and a sap green)
- 140 lb watercolor paper, cold press works best for this style
- A sharp pencil and white eraser for the initial heart sketch
- One synthetic round brush (size 6) and one detail liner brush
- A fine liner pen or dip pen with waterproof black ink
Mapping Out the Anatomical Heart Drawing Without a Reference Guide
Drawing the actual organ can feel intimidating, but you do not need to be a medical illustrator to get a convincing result. Start with a simple oval shape that slightly tilts to the left, since that is the natural orientation of the human heart in the chest. The bottom tip should taper to a point that is off center, and the top should have those little stubs where the major vessels would connect.
Once you have the basic outline, use your pencil to sketch in the curved lines that separate the atria from the ventricles. This is where the drawing ideas start to click, you are not tracing every single fiber, just hinting at the general anatomy. The cracks and fissures are actually the fun part because they let you draw jagged, organic lines that break up the silhouette. Do not be afraid to make these cracks deep and dramatic, they are what will hold your tulips later.
Painting the Chambers With Soft Pink and Beige Washes
Now comes the part where you bring the heart to life, or at least to a beautifully artistic version of life. Wet the entire heart shape with clean water first, then drop in a wash of pale pink and a touch of beige into the upper chambers. Let the colors bleed into each other naturally, this gives that translucency you see in the original illustration reference.
For the lower chambers, switch to a slightly stronger pink mixed with a hint of brown to create that fleshier, denser look. The goal is to keep the middle values light, because you need the contrast for the dark red fissures you will add later. Let this dry completely, or use a hairdryer if you are impatient. Once it is dry, you can start layering a deeper crimson into the corners and along the edges of the cracks to create shadows, this is what makes the heart look dimensional.
Adding the Deep Red Cracks and Thin Black Lines
With your detail brush, mix a dark, slightly transparent red and start tracing the major fissures that you sketched out earlier. Keep the lines a little wobbly, a little organic, because a perfect line will look fake. You want the cracks to look like the heart has been broken and put back together, or perhaps left open for life to grow.
After the red dries, take your waterproof ink pen and add thin black lines alongside the darkest parts of the cracks. This is the step that really makes the anatomical heart pop off the page, it adds that graphic, sketchbook vibe. The trick is to use the ink sparingly, think of it as jewelry. A few sharp lines here and there will do more than outlining the entire thing, and you can also use the pen to add light hatching in the arteries to show depth.
Painting the Pink Tulips and Green Stems So They Look Alive
Here is the magical part, positioning the tulips so they look like they are actually sprouting from the wounds. Choose two or three main cracks and draw small, curved stems leading up out of them. They should arch gracefully, as if seeking sunlight, which contrasts nicely with the heavy, grounded feel of the heart.
For the tulips themselves, use a bright, cheerful pink that stands out from the pale washes in the chambers. A simple tulip shape is just a small cup with a few pointed tips, so do not overcomplicate the petals. Use your green paint to add slender leaves at the base of each stem, and notice how the green instantly balances the deep red tones of the heart. This color combination is the heart of the valentine’s day art appeal, it is literally the cycle of growth and emotion on one page.
Great Romantic Sketch Ideas and Gift Packages on a Budget
Once you have finished this first painting, you will probably want to use the design for actual Valentine’s Day art gifts. This design works wonderfully as a card for a partner who appreciates something weird and unique. Just cut your painted paper down to size, fold it, and write a note inside about how love grows from the broken places. It is way more personal than a store bought card.
I have also made a habit of turning my finished practice pieces into bookmarks. That idea might sound simple, but it costs almost nothing and feels like a high end gift. If you want to go a step further, scan your painting and print it on some quality paper to make a little print set; that is a neat way to share your art without giving away the original. For craft inspiration, check out my Pinterest board where I collect floral art and valentine’s day drawing ideas, there is a whole community of artists doing this exact style.
My Personal Sketchbook Trick for Getting Started
I know how easy it is to stare at a reference photo and feel like your version will never measure up. My advice is to do a quick, tiny thumbnail sketch first, just a little doodle that is the size of a coin, before you even touch the big paper. This warms up your hand and gets the composition into your brain without the pressure of ruining a “nice” piece of paper.
And listen, plan to make a mess. Your first wash might be too dark, or you might accidentally paint the tulips over the black ink too soon. That just means you are learning, and the next one will be better. I still have a stack of failed anatomical hearts in my closet, and honestly, they make me laugh because they forced me to slow down. Keep the mood light, put on some music, and remember that you are doing this for the joy of drawing ideas that feel alive.
There is something deeply satisfying about mixing the macabre with the delicate. This watercolor heart is not just a painting, it is a reminder that we carry our cracks with us, and from those exact fissures, something beautiful can bloom. I hope you give this one a shot, and if you do, I would love to hear how your tulips turn out. Find me on the blog or pin your version to your own board so we can keep this artistic conversation going.
Leave a Comment