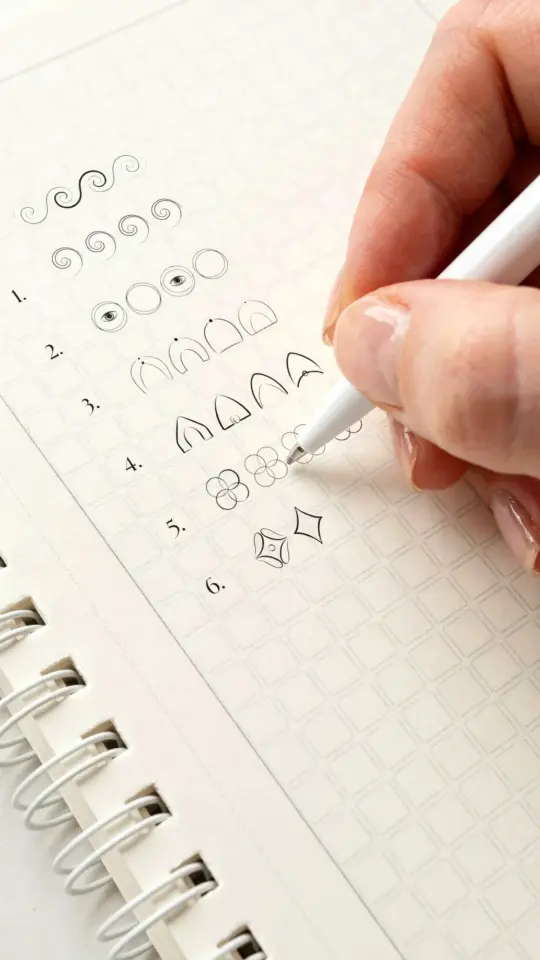
Look, I want to show you how to use this cute pattern drawing tutorial to fill your sketchbook with those tiny, satisfying doodles you see on Pinterest. I’m talking about the ones that look impossibly neat, yet somehow totally achievable. Here’s the thing: they are achievable. You just need to know a few basic moves to get started.
Honestly, the secret to a great doodle pattern is not artistic genius. It is pure, dumb repetition. You are basically making a tiny stamp with your pen, over and over, in a smart way. Once your hand learns the shape, your brain just switches off. That is the relaxation part everyone talks about. Grab any old ballpoint pen and a piece of scrap paper, and let’s figure this out together.
What You Actually Need (It’s Less Than You Think)
You don’t need a fancy art kit for this. I mean it. If you can find a pen that still has ink and a paper surface that isn’t a napkin, you are officially ready to go. This is not a hobby that requires a trip to the craft store. It is an “I’m waiting for my coffee to brew” hobby.
If you want a little advice, grab a pen that feels smooth as you drag it across the page. I am personally addicted to the cheap Bic Round Stic, the clear plastic one. They run out of ink fast, but they just feel right in my hand. As for paper, anything works, but something with a little tooth, like a standard printer paper, grabs the ink nicely and stops the lines from looking shaky.
The Most Important Rule: Relax Your Hand
Here is the mistake every beginner makes. They grip the pen like they are trying to squeeze juice out of a rock. That tension makes your lines wobble. It makes your hand ache after thirty seconds. Your lines look nervous because your muscles are nervous.
So let’s do a quick reset. Shake your hands out like you just washed them and there are no paper towels. Pick the pen up and hold it gently, like you might hold a tiny bird. No squeezing. Let your arm, not your fingers, do the moving. When you draw a line, pull it toward your body or push it away, try not to use your wrist so much. It feels weird at first, but it changes everything.
Pattern #1: The Polka Dot Plant
Ok so, this is the absolute easiest place to start. Make a grid in your head, or just start placing dots randomly. Now, draw a tiny circle around each dot, leaving a little space between the circle and the center dot. That’s it. You just made a target. Do this across the page.
Now, to give it some cute pattern energy, shade in the little corner of each circle. Pick a spot, say the top right corner, and fill it in. It looks like the petals of a flower are catching a shadow. I know it sounds too simple, but when you look at the finished page, it honestly looks like something you’d see printed on a sticker pack. Try mixing up the sizes of your dots. Big ones, tiny ones, medium ones scattered around. It adds a chaotic, organic vibe that is way more interesting than a uniform grid.
Pattern #2: The Scalloped Stack
This one is my absolute favorite, and it’s the most forgiving. It looks like little fish scales or a fancy ceramic tile. Start by drawing a row of overlapping U-shapes. Basically, just draw the letter U, but as you finish the right side of one, start the left side of the next one right over it. You want them to look like they are holding hands.
Once you have that first line, draw another row right underneath it, slotting the U’s in the spaces of the row above. If you mess up the overlap, do not panic. Just draw it again. It is a doodle, not a surgical procedure. For a nice touch, put a tiny dot in the middle of every scale. Or, if you’re feeling spicy, use a darker pen to outline the bottom row of the scales to make the pattern look layered. That little shadow detail sells the whole “cute pattern” look, and it costs you zero extra effort.
Pattern #3: The Wobbly Vines
Vegetation is your best friend when you want to learn how to draw a pattern. Nature is messy, so your lines are allowed to be messy. Draw a wavy line across your paper. It doesn’t have to be uniform, actually, it should be irregular. Think of a gentle sea serpent swimming over the page.
Now, draw a parallel wave about a half-inch below the first one. You’ve got a wiggly tube. Time to fill it. Draw tiny leaves sprouting out of the top wave. They don’t need to be detailed; just make a little sideways teardrop shape. Then, alternate by drawing small circles (berries, maybe?) hanging down from the bottom wave. This combination feels effortlessly cute. What’s nice is that you can stop drawing after one vine and it looks like a legit border for a journal page. Or you can cram six of them down the page and call it a day.
Pattern #4: The Staggered Diamond Grid
Geometric stuff usually scares people, but this one is a cheat. Instead of drawing perfect diamonds, we are going to make them using two lines. First, draw a diagonal line going one way. Leave a gap, then draw another diagonal line parallel to it. Keep going down the page. Now, do the same thing but the lines slope in the opposite direction, crossing the first set. You just made a football pattern. No, wait, you made a diamond pattern.
Here’s the trick to make it a “pattern drawing” and not just a mess of lines. In every other diamond, shade the bottom half. Or, put a tiny X in the center of every other diamond. The contrast between the empty spaces and the filled spaces is what creates the visual rhythm. It tricks people into thinking you did something complicated. You didn’t. It’s just lines and a little ink. But they don’t need to know that.
How To Fix Your “Mistakes”
Look, you are going to mess up. You will draw a line that jumps too far, or you’ll accidentally make a U-shape that look like a weird potato. Here’s how you fix it: you don’t. You just incorporate it into the pattern.
If a dot is out of line, add a few more dots around it. It’s not a mistake, it’s a grouping. If a line is squiggly, lean into the squiggle. Make the next line just as crazy. Honestly, the imperfections are what make hand-drawn patterns look so much better than machine-printed ones. The human hand can’t make a perfect circle, and that’s exactly why they look so charming. Let the wobble be the aesthetic.
Putting It All Together On The Page
Once you’ve played with each pattern on its own, try a little grid. Divide your paper into four boxes. Put the dots in one, the scales in another, the vines in the third, and the diamonds in the last. Boom, you’ve got a mini pattern library. This is the perfect way to plan out a page in your bullet journal.
Or, just do this: take a blank page and start in one corner with any of these patterns. Draw it until you get bored, then swap to a different pattern right next to it. Let them collide. Let them run into each other. The border where they meet is always the most interesting part. It gives the page a playful, “gallery wall” kind of energy, even if it’s just a bunch of pen marks on a Post-it note.
You don’t need to finish a whole page if you don’t want to. A little corner filled with these cutepatterns is enough to make a difference. I know I said don’t need a planner, but honestly, try this in a cheap notebook. A tiny, finished square of wonder is better than another desert of blank paper. So, go find that blue pen on your desk. Draw a few dots, draw a few U’s. See if you can switch your brain off for twenty minutes. You might surprise yourself with what you like the look of. Happy doodling, and show me what you come up with in the comments or save this for your next sketchbook session!
Leave a Comment