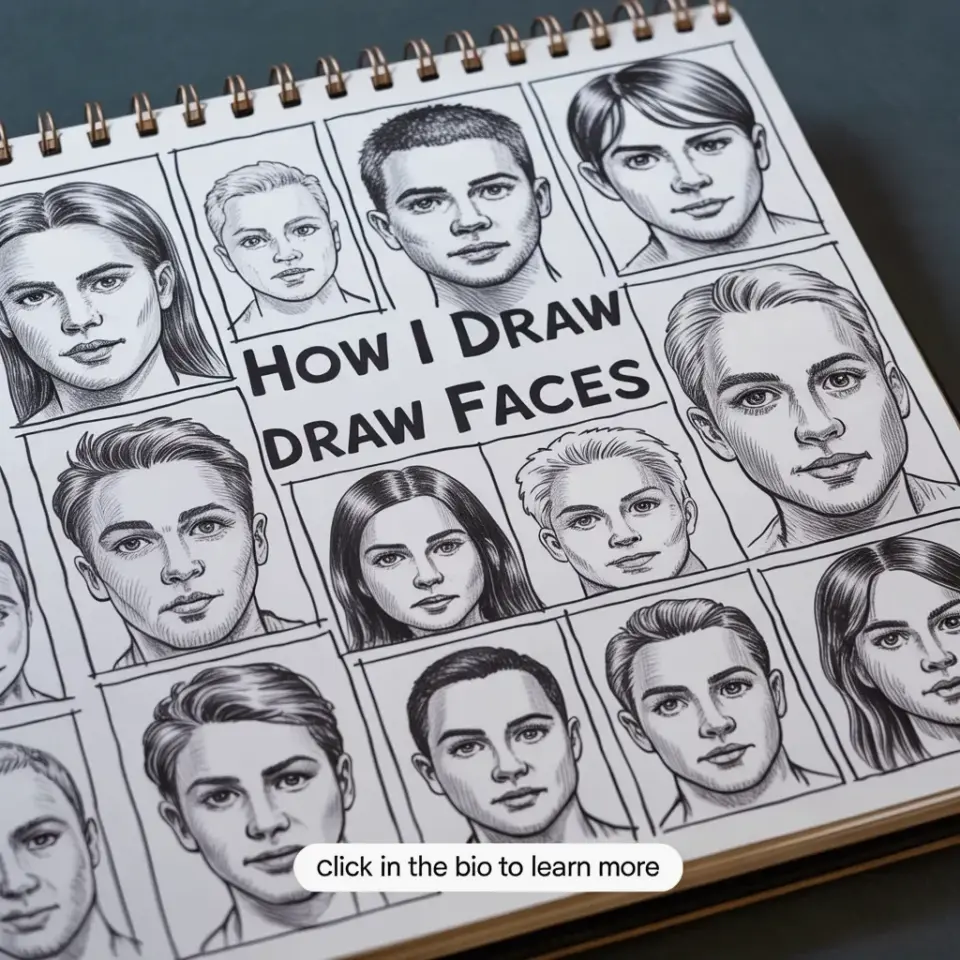
Look, if you follow me on Instagram, you probably watched me flip through that sketchbook page last week. The one with the faces in a perfect grid, all those pencil studies crammed together like a family photo album. I captioned it something about proportions, and my DMs absolutely flooded with the same question. How do you get the features to line up? What’s the secret? Honestly, it’s not a secret. It’s a system. And it starts with admitting that your face drawings look wonky for one specific reason, you’re drawing eyes before you’ve even found the chin.
Here’s the thing about facedrawing: it’s a logic puzzle, not a talent contest. The artists who make it look effortless aren’t starting with the lashes and the nostril detail. They’re starting with a map. They’re measuring, comparing, and blocking in the big shapes until the proportions click. That sketchbook page you saw is my daily map-making session. And yeah, it looks a little repetitive. That’s the point. Repetition is how you rewire your brain to see faces as relationships, not separate parts.
Why Your Face Drawings Look Wonky (It Isn’t Your Shading)
We all have that one drawing we’re embarrassed to show anyone. The eyes are too big, the nose is drifting sideways, and the mouth looks like it’s having an argument with the jawline. You spent three hours on it. You shaded beautifully. And it still looks like a Picasso from a parallel universe.
The culprit? You started with the details before you built the foundation. It’s like painting your bedroom walls before you’ve checked the foundation for cracks. Sure, the paint is lovely. But the walls are still sinking. In artpractice, this is the number one killer of portrait progress. You get so excited by the sparkle in the eye that you forget to check whether the eye is even sitting in the right socket.
Whenever I see a wonky face drawing in my workshops, I ask one question. Can I see your construction lines? And nine times out of ten, the student looks at me blankly. They had no construction lines. They just started drawing. Look, I get it. Construction lines feel like unnecessary homework. But they’re the scaffolding that keeps the whole building upright.
The Game-Changing Grid Method I Use for Every Sketchbook Page
Ok so, let’s talk about the actual page in the photo. You can see the spiral binding on the left edge, and there’s this title scrawled in the middle that just says “How i draw faces.” No capital letter. Very chill. And below that title, those little faces are arranged in a loose grid pattern. That’s not accidental. That’s the method.
I call it the “proportion grid.” Before I draw so much as an eyebrow, I lightly sketch a grid over the face shape. Usually a 2×3 or 3×3 grid, depending on the angle. This gives me a consistent reference to check where everything should sit. The eyes go on the horizontal midline. The nose lands on the vertical center, and the mouth sits exactly two-thirds of the way down from the nose to the chin. Boring? Maybe. Effective? Utterly.
Here’s a quick breakdown of what that grid does for you:
- It kills the guesswork. You stop eyeballing and start measuring.
- It gives you a mental checklist for every face you’ll ever draw.
- It makes you slow down, which is a good thing. Fast is slow for beginners.
If you’re sketching from a reference photo, do yourself a favor and grid the photo too. Even just a light pencil line down the middle and a horizontal line across the eyes will transform your accuracy. It sounds so simple. But I promise, it’s the difference between a face that looks like a face and a face that looks like a happy accident on a bad day.
A Simple Way to Map Out the Big Shapes First
Right before I get to any feature, I focus on the silhouette. The head shape. The jawline. The cranium. I’m not drawing a person at this stage. I’m drawing an egg with a slightly pointy bottom.
Let me be honest with you. This part is not glamorous. It’s just a bunch of loose ovals and soft curves on the page. But it’s the most important pencildrawing work you’ll do. Because if the egg is wrong, nothing you add on top will save it. You can draw the most beautiful eyes in the world, but if they’re sitting on a lopsided head, the whole portrait falls apart.
My rule of thumb is this: if the big shapes aren’t working, I don’t touch the details. I literally walk away. I flip the page. I start a new egg. Sometimes I do three or four eggs before I even like the head shape. That’s not wasted time. That’s called practice. That’s the drawingtips everyone skips because they’re impatient.
And speaking of impatience, let me tell you about this weird little habit I have. When I’m mapping out a face, I sometimes hum along to the playlist I’ve got on in the background. I know, I know. It’s a bit odd. But there’s something about the rhythm that keeps my hand moving steady. The slower the track, the softer my pencil strokes. Try it sometime. It sounds crazy, but it works.
The Technique That Keeps Facial Features in Alignment
Alright, the grid is down. The egg is perfect. How do you keep the eyes and nose from drifting off? Here’s the trick that I wrote at the bottom of that sketchbook page, right above the white text that says “Click in the bio to learn more.” I use what I call “alignment checkpoints.”
Before I draw the second eye, I measure the distance between the first eye and the center of the grid. Then I flip that measurement to the other side. This isn’t about being robotic. It’s about being fair to the person in your drawing. Their eyes deserve to be twins, not distant cousins.
Here’s another one that always bends my students’ minds. The bottom of the nose lines up with the bottom of the ears. Check it. Go look in a mirror. The ears attach to the head right around the same height as the nose. So if you’re drawing a face and the ears are floating up near the temples, guess what? It’s gonna look weird. You’ve got a set of ears doing yoga in the wrong pose.
Your drawing is going to have some marks that don’t work. Erase them. Do not be precious about the lines. The grid is there to be broken, or in this case, to be erased. Use a good eraser, the kind that doesn’t smudge your whole page into a gray mess. Your sketchbook deserves better than a cheap rubber brick.
How to Warm Up Your Hand Before a Detailed Face Drawing
Look, you wouldn’t sprint a marathon without stretching. So why would you start a portrait without warming up your hand? Before I tackle a full face drawing, I always do a few loose gesture sketches. I’m talking circles, cylinders, and maybe a few random ribbons of lines. Thirty seconds, max. This is pure pencil flow. It gets the blood moving and the wrist loose.
The photo in the blog post, the one with all those faces? That page was the result of a warm-up session where I just kept drawing the same head shape over and over. I started with a couple sketches that were, honest to goodness, pretty rough. But by the fifth try, the proportions started to click. By the tenth, they were locked in.
So many people skip straight to a finished piece and get frustrated when it looks stiff. Yeah. Of course it looks stiff. You didn’t give yourself permission to make ugly drawings first. You have a better chance of producing something you actually like, when you’ve already gotten the stiffness out of your system. Let the ugly ones happen. They’re doing behind-the-scenes work for you.
One Big Mistake That Ruins a Face Drawing (Even After the Grid)
So you’ve done the grid. You’ve measured everything. The proportions are spot on. And yet, the face still looks dead. Flat. Like a mask. What gives?
I’ve been there. We all have. But here’s what I’ve learned from hours of artpractice. A face drawing is ruined when you treat shading like a coloring book. When you just fill in the shadows and think, done. But shading has to follow form. It has to wrap around the cheekbone, follow the curve of the jaw, and tuck under the lower lip.
Go back to the image of the sketchbook. See those pencil drawings in the photo, with the detailed shading and line work? The shading is what makes them feel like faces, not just outlines. It’s the soft gradation of the graphite that gives that illusion of a nose sticking out. If you just color in a dark triangle under the nose, it won’t look like a nose. It looks like a hole in the page.
Also, quick pet peeve. The infamous “toothpick neck.” You nail the face but then draw a line that’s somehow too thin and too thick at the same time, placed like a broken lamp post. Give the neck some form. A couple of soft strokes for the sternocleidomastoid muscle. Look, I didn’t come here to name-drop obscure muscles. Just don’t make the neck look like a stick. It’s a cylinder. Treat it with the same respect you gave the egg.
My Favorite Tools for Pencil Sketching Faces
Alright, gear talk. Because we all secretly love a small shopping list. But I’ll keep it restrained. I’m not gonna recommend a hundred different expensive things. For this type of face drawing page, you need three things.
First is a mechanical pencil with a 0.5 lead. I prefer a 2B lead. It’s soft enough to give you deep, rich darks, but hard enough to hold a sharp point for a while. Second, a good kneaded eraser. These little gray putty erasers are a blessing. You can shape them into a thin wedge and lift out tiny highlights. Or roll them into a ball to erase a big area. I love them, I think they’re a brilliant tool. That or a pen-style eraser with a fine precision tip. The kind that works like a pencil but erases like a dream.
And third? A crappy scrap piece of paper. You need a place to test your pencil pressure before you commit to the face drawing. Scribble a few value swatches first. Light. Medium. Heavy. This gets you out of the mindset of cheap or expensive and into the mindset of right and wrong. You make marks that fit the feeling, not the price tag.
This Week’s Face Drawing Challenge: The 5 Minute Grid
If you’ve been reading this blog and nodding along but still haven’t picked up a pencil, let me give you a concrete challenge. It takes less than five minutes. No excuses. This is your drawingtips homework for the week.
Take a photo of a face. Any face. A magazine cutout. A picture of a friend. A screenshot from your phone. Draw a 2×3 grid over the photo. Then, using a new page in your sketchbook, draw the same grid on your blank page. Now, just sketch in the big shapes. The head outline. The main feature blocks. Do not, under any circumstance, draw an eye. The whole goal is just to find the layout.
I want you to feel how light the pencil needs to be. Feel the proportions in your hand. If it looks silly, perfect. That’s how mine looked too. The only difference between my sketchbook page and yours is repetition. I’ve just done this drill more times. That’s not a talent thing. That’s a time thing.
Stop waiting to be inspired. Just use the grid.
Look, I realize this whole article could be summarized in two words: slow down. But it’s the kind of lesson that takes a hundred wonky faces to truly understand. So do yourself a favor. Find a photo, grab that sketchbook, and draw out your grid. Then tell me if your faces don’t start looking, you know, human.
If you want to see exactly how I map out these features, step by step, click the link in my bio. The full tutorial is waiting for you there. Catch you next week with another page from the sketchbook. Probably with some coffee stains on it this time, because I refuse to eat breakfast away from my drawing desk.
#facedrawing #sketchbook #drawingtips #artpractice #pencildrawing
Leave a Comment