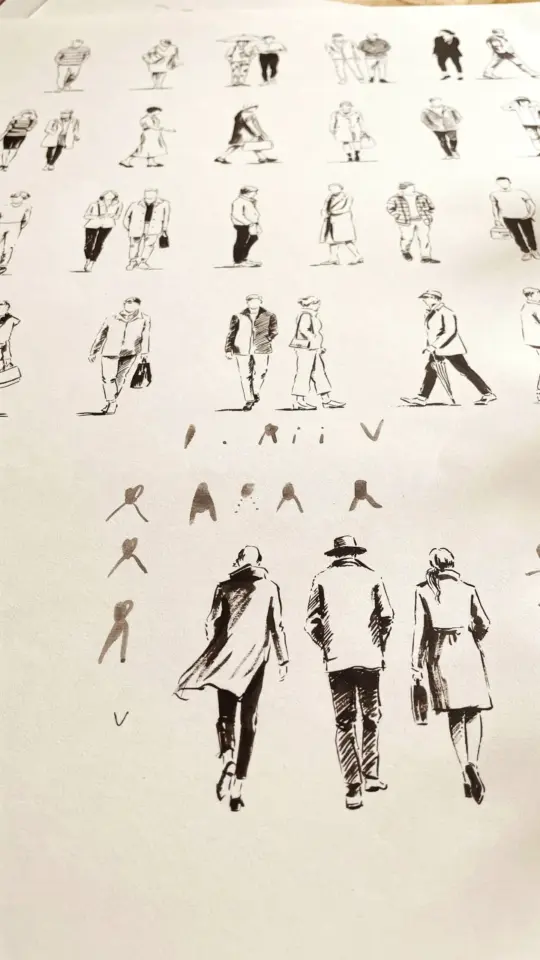
If you have ever tried drawing a person and ended up with arms that look too long or a torso that feels squished, you are not alone. Many beginners struggle with figure proportions because the human body is surprisingly complex. But there is a simple trick that can instantly improve your accuracy: placing dots on key joints and landmarks before you draw any lines. This dot method works for any pose, whether standing or seated, and it is one of the best drawing people proportions techniques for absolute beginners. By marking shoulders, hips, knees, and elbows with tiny dots, you create a visual skeleton that keeps everything balanced. The best part? You do not need any special tools, just a pencil and paper.
Why Dots Work Better Than Guessing
When you try to draw a full figure freehand, your brain tends to focus on details like the face or hands too early. That often throws off the overall proportions. By using dots, you force yourself to think about the big picture first. Each dot represents a structural anchor point. Connecting them with light lines later helps you check if the distances look right. This method trains your eye to see relationships between body parts, which is exactly what proportion drawing is about.
Another reason dots are effective is that they simplify the figure into basic geometry. Instead of worrying about muscles or clothing, you just place a dot for the top of the head, the chin, the shoulders, the hips, the knees, and the feet. Once those are in place, you can adjust them easily. A dot that is too high or too low takes only a second to erase and move, unlike a full arm line that might need redrawing.
How to Place Dots for Standing Poses
Start with a standing pose because the vertical alignment is easier to grasp. Lightly mark a dot for the top of the head and another for the bottom of the feet. Then find the midpoint of that vertical line; that is roughly where the hips should be. Place a dot there. Next, the shoulders sit about one head length below the chin, so mark that. For the knees, they usually fall halfway between the hips and the feet. Elbows align near the waist when the arms are relaxed at the sides. Wrists hit around the hips.
- Head to chin: about one head height (measure with your pencil)
- Chin to shoulders: roughly the width of one head
- Shoulders to hips: again about one head height
- Hips to knees: roughly two head heights
- Knees to feet: also around two head heights
These measurements are not strict rules, but they give you a reliable starting point. For a more realistic figure, the shoulders are usually wider than the hips for most male figures, and the hips are wider or equal for most female figures. Adjust your dots accordingly and keep the spacing loose.
Adjusting Dots for Seated or Dynamic Poses
Seated poses change the relationship between dots because the legs bend. Instead of a straight line from hips to feet, the thigh drops forward and the shin goes down. A good trick is to first draw the chair or surface as a simple line. Then place a dot for the hip, then the knee (which will be lower and forward), then the ankle, and finally the foot. The distance from hip to knee stays the same as in a standing pose, but the angle changes. For dynamic poses like walking or leaning, the key is to keep the dot spacing consistent. A leaning figure still has the same head-to-shoulder and shoulder-to-hip ratios; only the orientation shifts.
Practice a few quick sketches where you only draw the dots and the connecting lines. Do not worry about making the person look perfect. The goal is to see if the proportions feel right. If a dot is out of place, the whole figure will look wonky. That is the feedback you want early on.
Common Mistakes Beginners Make with Dots
One mistake is placing dots too close together, especially for the shoulders and hips. Beginners often make the torso too short. Remember that the ribcage and pelvis need some vertical space. Another pitfall is forgetting the neck. A lot of people draw the head directly on top of the shoulders, which makes the figure look hunched. Leave a gap of about half a head length between the chin dot and the shoulder dots. Also, do not make the arms too long. When standing, the fingertips should reach about mid-thigh. If your elbow dots are too low or too high, the whole arm length goes off.
Finally, some beginners use dots that are too dark or big. Keep them tiny and light, just barely visible. You will erase most of them later anyway. A heavy dot is hard to adjust, and it can interfere with your final linework. Stick to light pencil strokes and build up gradually.
Practicing with Simple Shapes Around Your Dots
Once your dots are in place, you can rough in the basic shapes. Draw a small oval for the head, a rectangle for the torso, and cylinders for the limbs. This is where dot-based proportion drawing becomes really useful. Because your dots mark the joints, you know exactly where each shape starts and ends. For example, the shoulder dot tells you where the arm attaches to the torso. The hip dot tells you where the leg begins. By drawing shapes that connect to these dots, you avoid the common problem of limbs floating
#drawingpeople #sketchingtips #figuredrawing #proportiondrawing #arttutorials
Leave a Comment