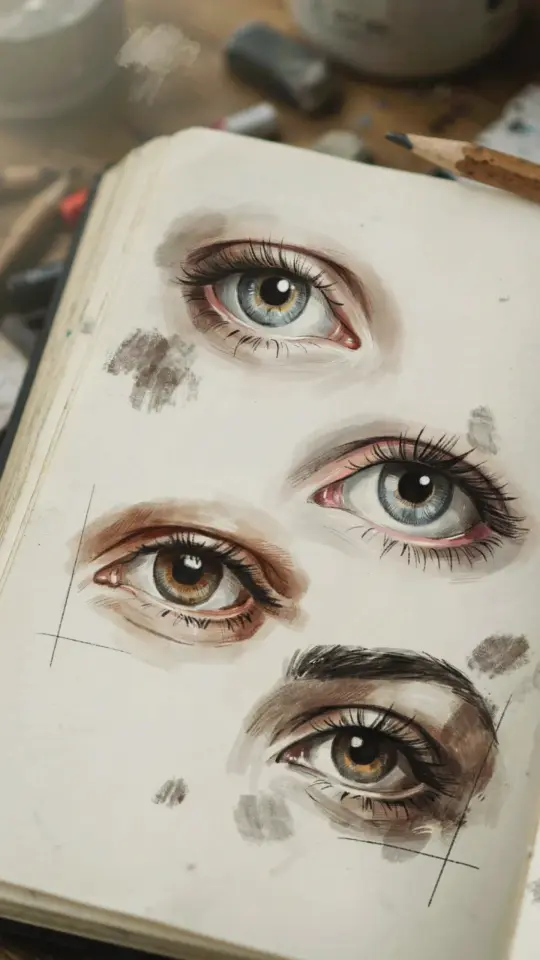
I never thought I could draw a realistic eye without fancy supplies. But then I tried an eye drawing on a budget, using just a basic pencil and eraser from the dollar store. And you know what? It worked. Look, I’m no professional artist. I just like sketching in my cheap spiral notebook while watching reruns of old sitcoms. The result surprised me, and it can surprise you too. Honestly, if you’ve been putting off drawing because you think you need a set of expensive graphite pencils, a kneaded eraser, and a blending stump, stop right there. You have everything you need already. Probably in that junk drawer by the kitchen sink.
Why a Dollar Store Pencil and Eraser Are More Than Enough
Heres the thing: realistic eye drawing for beginners is mostly about pressure control and patience. Not about the brand of your pencil. The cheap number 2 pencil you grab from a pack of ten? That’s totally fine. It has a soft enough lead to leave light gray marks, and if you press hard, it goes dark. So you get a whole range of values from a single tool. No blending stump? Use your finger. No white gel pen for highlights? Use your eraser.
One weird personal detail. I once tried drawing with a pencil that had a crack in the wood near the tip. Every time I sharpened it, a piece of the wood fell off into my lap. Annoying, yes. But the marks it left on paper were exactly the same as a “professional” pencil. So don’t get hung up on perfection. Grab what you have.
The One Setup Trick That Changed My Eye Sketches
Before you draw anything, think about your light source. I know, sounds technical. But it’s simple. Look at your own eye in a mirror (or a photo on your phone). Notice that little white dot in the reflection, the one that makes the eye look alive. That dot always sits on the same side as the light. If you’re drawing from imagination, decide where the light is coming from. Top left is popular. Stick with it.
Also, sharpen your pencil to a fine point. Not a dull, rounded tip. A sharp point lets you do those thin lines for lashes and the subtle creases around the eye. For the softer shading, you can always dull the tip by rubbing it on a scrap piece of paper.
Layering Light Strokes Like a Pro (Using Just Your Finger)
Ok so here’s the real secret. Don’t try to get the full darkness in one go. That’s how you get a muddy, gray mess. Instead, use light pressure and build up slowly. Draw a soft oval for the eyeball shape, then fill it in with very faint diagonal strokes. Then take your fingertip (make sure it’s clean and not greasy) and gently smudge those strokes. Blend them in a circular motion.
Honestly, the first time I tried blending with my finger, I left a greasy smudge because I had just eaten peanut butter crackers. Not ideal. But after wiping my hands on my jeans, it worked perfectly. So wash your hands first. Or use the side of your pinky. Anyway, after blending, you’ll have a nice smooth gray tone. Then go back with your pencil and add another layer of strokes. Blend again. Repeat until the iris looks deep and rich.
A quick list of the layering steps I follow:
- Draw the outline of the eye and iris lightly.
- Fill the iris with light, short strokes. Follow the curve of the iris.
- Blend with your finger until the strokes disappear.
- Add a second, slightly darker layer of strokes near the top edge of the iris (that’s where a shadow usually lives).
- Blend again and repeat until you like the darkness.
- Leave the center (pupil) for last. Make that the darkest part.
The Eraser Trick That Pops the Iris and Reflection
Once your iris is shaded and blended, it probably looks a little flat. That’s where the eraser comes in as a drawing tool, not just a mistake fixer. Use the edge of your eraser (the clean edge) to gently lift out a thin ring around the pupil. This creates that subtle lighter edge that makes the iris look like a sphere.
Then for the highlight. You know that little white dot I mentioned earlier? Don’t try to leave it white by drawing around it. That never works. Instead, shade over the whole area, let it go gray, then erase the dot right back to white. A clean eraser will do that. Press lightly, twist, and lift. If your eraser is covered in graphite from previous uses, rub it on a clean part of paper first. One quick swipe and it’s white again.
And here’s a hyper specific detail that sounds weird but helps. If your highlight looks too perfectly round, it looks fake. Real reflections are slightly irregular. So after erasing the main dot, take the eraser and just nudge one edge of the dot to make it asymmetrical. That tiny imperfection sells realism more than anything else.
Don’t Forget the Lashes and Tears (They Sell the Realism)
You have a nice shaded eye now. But without lashes, it looks like a doll eye glued onto paper. Lashes need to grow from the edge of the eyelid, not float above it. Draw them with quick, curved strokes. Start at the lid, press hard at the base, then lift your hand quickly so the line tapers to a fine tip. Some lashes should point slightly outward, some slightly inward. And not all of them are the same length. That’s normal.
For the lower lashes, use a lighter touch. They are thinner and less prominent. One or two stray lashes crossing over the eyeball (especially near the inner corner) adds a lot of realism. Also, look at the inner corner of your own eye. See that little pinkish bump called the caruncle? Draw it as a small curved shape and shade it lightly. Don’t forget the tear duct line. Just a faint curve.
And if you want to add a subtle tear or a watery shine, draw a tiny crescent shape just under the pupil. Erase the inside of that crescent to white. That mimics the reflection of a glossy eye surface. It’s ridiculous how one little white crescent can make the whole drawing look wet.
My Dollar Store Sketchbook Setup and Why It Works
I use a sketchbook that cost me two dollars. The paper is slightly off-white and a bit thin. That actually helps because it has a little tooth (texture) that grabs the pencil graphite. Smooth paper can be too slippery for layering. So don’t worry if your notebook isn’t fancy art paper. Also, don’t use paper that’s super glossy or coated. Printer paper works fine. Construction paper is too rough. You want something in between.
One thing I’ve learned the hard way. If your eraser leaves pink smudges on the paper, it’s because the eraser is old or cheap. You can fix that by scratching the surface of the eraser on a rough piece of cardboard first. Or just buy a fresh white eraser for a quarter. That’s still within the budget artist mindset.
I store my eraser in a little tin mint box so it doesn’t pick up dirt. Probably overkill, but it keeps it clean. You do you.
Three Common Beginner Mistakes and How to Fix Them
Almost everyone makes the same mistakes. Here are three that I still catch myself doing sometimes.
- Drawing the eye too big. An eye is only about one-fifth the width of your head. Compare your drawing to your own reflection. If it’s huge, scale it down.
- Forgetting the upper eyelid shadow. The eyelid is not flat. It casts a slight shadow onto the top of the eyeball. Without that, the eye looks flat. Shade a thin crescent shape across the top of the iris.
- Making the outline too dark. The edge of the eyeball is not a black line. It’s a soft transition from skin to white to iris. Lighten your outline and let shading do the work.
So yeah, grab a pencil and try it yourself. You might surprise yourself. It doesn’t take much to start seeing real progress. Just a cheap tool, a little patience, and permission to make a few messy drawings along the way. That’s how I learned, and I’m still learning every time I sit down to sketch.
Leave a Comment