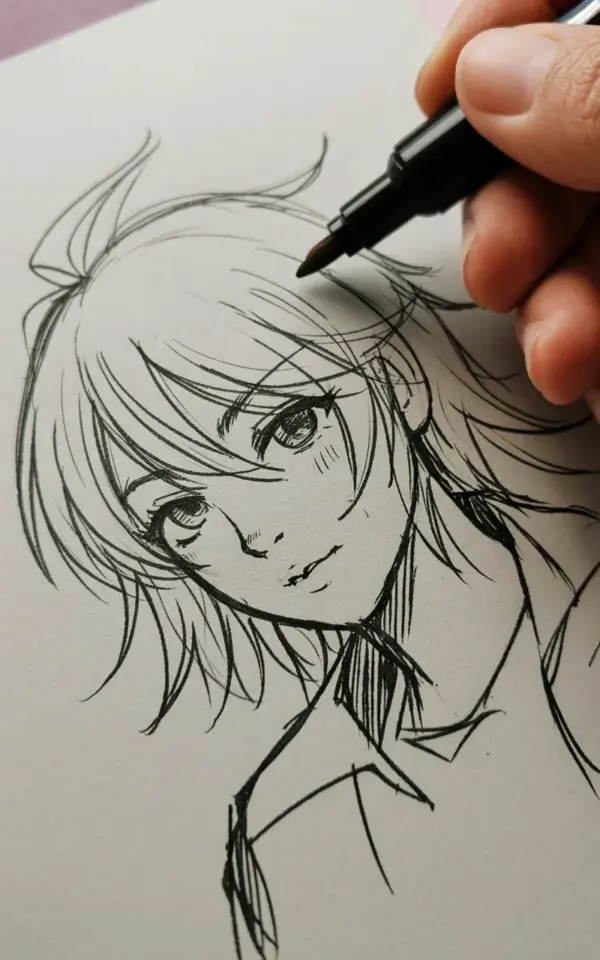
The morning light hit my desk just right, casting a soft shadow across the textured paper. I had my black marker in hand, mid-sweep, drawing a long curved strand of anime hair. That was the exact moment I realized the secret to making hair look alive isn’t in the final polish, it’s in the motion of the stroke itself. Drawing anime hair doesn’t have to be a rigid, cell-shaded process. It can be loose, messy, and full of energy.
This close-up shot shows what I’ve learned through countless sketch sessions. The sketch in the photo features flowing lines, still in progress, with the marker tip visible at the top of the frame. The even lighting on the off-white paper makes every motion clear. That clarity matters, because the way you move your hand changes everything about the result.
### Start with a Pencil Sketch That Feels Like a Wind Storm
Before my marker ever touches the paper, I lay down a pencil sketch that looks like controlled chaos. Honestly, most of my best anime hair starts with a few sweeping arcs that don’t connect perfectly. I want the pencil lines to cross over each other, creating a blueprint for where the hair will eventually rise and fall.
The curved lines in this sketch are doing something specific. They’re building volume by following the natural shape of the head, not just flowing straight down. When you map out your anime hair, imagine the strands are responding to a breeze. Let your pencil follow that imaginary current.
### Hold the Marker Like It’s a Paintbrush, Not a Pen
Here’s the thing, most beginners grip their marker way too tight. They hold it like they’re signing a legal document. You can see in the close-up photo that my hand is relaxed, with the marker angled back, letting the tip glide across the white paper.
A loose wrist is your best tool for creating movement. Instead of drawing a single continuous line, try flicking your wrist at the end of each stroke. That flick creates the natural taper you see in anime hair, that sharp, wispy point that makes it look dynamic. It takes practice, but the payoff is huge.
### Use Curved Lines to Trick the Eye into Seeing Depth
Straight lines are for robots. Curved lines are for characters with personality. The sweeping strokes in the sketch are curving inward and outward, mimicking the way real hair wraps around a three-dimensional head.
If you want your anime hair to have volume, vary the pressure you apply as you draw. Press down harder at the base of the strand, then ease off as you reach the end. This slight variation in line weight makes the hair look thicker at the roots and lighter at the tips. It’s a simple trick, but it adds a ton of depth.
### Forget Perfection, Chase the Motion Instead
I ruined so many drawings trying to make every strand identical. It never worked. It always came out stiff and lifeless. Now I chase motion over precision, and the results are way better.
– Avoid drawing every single hair strand. Group them into chunks.
– Let some lines overlap or veer off unexpectedly.
– Break the tip of the line with a quick flick, don’t end it with a slow press.
The loose marker strokes in the photo are what make the hair feel alive. That energy is contagious. When you stop worrying about making a mistake, your hand moves faster, and those fast marks are where the magic happens.
### Build Volume in Layers, Starting with the Darkest Areas
Anime hair usually has a clear shadow layer and a highlight layer. In this marker sketch, I’m working on the mid-tone and shadow areas first. By blocking in the darker sections under the main hair clumps, I create a foundation that makes the lighter pencil lines pop.
Think of it like construction. The pencil is the scaffolding, and the marker is the concrete. You don’t want to pour the concrete before the scaffolding is stable. Work back and forth, adding a bit of pencil, then a bit of marker, letting the two mediums talk to each other.
### Don’t Be Afraid to Let the Marker Bleed
This might sound like a style preference, but it’s really a mindset shift. Marker bleed, that slight spread of ink at the edge of your line, is not a disaster. It can actually mimic soft shadows or the texture of thick hair.
Look, if you want flawless, borderline digital looking art, use a pen with a fine nib and a ruler. But if you want your drawing to have life, let the ink soak into the textured paper. The off-white paper in the photo absorbs the marker slightly, which gives the whole sketch a cohesive, organic feel.
### Practicing the “Ta-da” Motion for Hair Tails
This sounds silly, but it works. To get those iconic anime hair spikes and swooshing tails, practice the motion a waiter makes when they’re presenting a plate. That little upward flick of the wrist, the “ta-da” gesture, is exactly how your marker should move at the end of a hair strand.
Start the stroke slow, let the marker sink in. Then, as you reach the end, speed up and lift the marker off the paper. The faster you go, the lighter the tail becomes. This creates a natural point without needing to go back and fix it. That motion is visible in the sketch, and it’s the single easiest way to instantly improve your hair drawing.
### When to Stop and How to Wrap Up
There’s a moment in every sketch where I have to stop myself from overworking it. I have a tendency to keep adding strokes until the paper shreds. The sketch in the photo is at that perfect point where it looks intentional and free. That’s the goal. Push yourself to stop while the momentum is still fresh.
So grab your own marker and some paper. Try these loose strokes, curve your lines, and let your wrist relax. Use the hashtag #animeart when you’re done, and save this post for your next sketch session. Just remember, it’s about the motion, not the perfection. Keep your wrist loose, and the rest will follow.
Leave a Comment