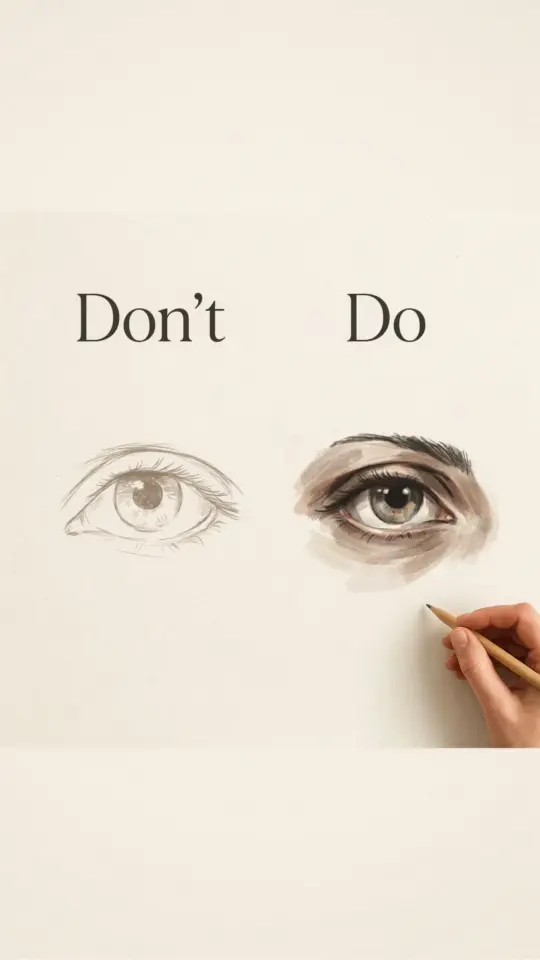
If you want to get better at realistic eye drawing but feel stuck on making the eye look flat or lifeless, you are not alone. The secret is usually in the eye lens and how light bounces off it. I remember trying to draw eyes for years and always ending up with something that looked more like a cartoon than a real person. Then I learned one simple thing: the light reflection on the cornea changes everything. In this realistic eye drawing tutorial, I will walk you through the exact steps I use to draw an eye lens with believable light reflections, even if you have never drawn a realistic eye before. No fancy terms, just practical tips you can try right now.
Why the Eye Lens Matters for a Realistic Gaze
The eye lens (the clear front part over the iris and pupil) is what gives an eye its wet, glossy look. Without it, the eye appears dry and flat. Most beginners focus only on drawing the iris and pupil, but they skip the subtle highlights and soft gradients that make the eye feel round. Think of the lens as a transparent dome. Light hits it, creates a sharp reflection, and then scatters softly across the surface. If you can capture that one highlight and the surrounding soft shadow, your eye drawing will instantly look more realistic.
For a beginner friendly approach, I suggest you forget about every detail you think you know. Just focus on three things: the light source, the reflection shape, and the gentle darkening around the edge of the lens. That is enough to get a convincing realistic eye lens drawing.
Step 1: Find Your Light Source and Sketch the Reflection
Before you put pencil to paper, decide where the light is coming from. Is it from the top left? Top right? Straight on? This choice controls where you place the highlight on the cornea. The highlight is usually a small curved shape that follows the curve of the eyeball, not a perfect circle. I usually draw a tiny crescent or an oval near the top of the iris for a soft window reflection, or a simple circle for a single light bulb.
Here is my process for sketching the reflection:
- Lightly draw the outline of the eye (eyelid crease, upper and lower lid, iris circle, pupil).
- Mark the light source direction with a small arrow off to the side.
- Sketch the main highlight shape on the iris, right where the light hits. Keep it small and close to the upper edge of the iris.
- Add a secondary, softer highlight on the opposite side of the iris (often a faint smudge).
- Erase any harsh lines around the highlight so it stays crisp.
This simple highlight placement is the foundation of any light reflection eye drawing tutorial. Without it, the eye will never look wet.
Step 2: Add Soft Shading Around the Iris
Once your highlight is in place, start shading the iris itself. The iris is not one flat color. It has rings, flecks, and a deeper ring around the outer edge. But for a beginner, I recommend a simpler approach: use a soft pencil (like a 2B or 4B) to shade the entire iris a medium gray, then darken the outer rim. Leave the area around the highlight completely white. The contrast between the dark outer iris and the bright white highlight is what creates the illusion of depth.
For the shading, use small circular motions or side-of-pencil strokes. Blend gently with a tissue or your finger, but be careful not to smear the highlight. If the highlight gets gray, use a kneaded eraser to lift it back to pure white. I always keep my highlight bright and sharp because that is where the eye catches light. A muddy highlight ruins the illusion no matter how good the rest of the drawing is.
This part is the core of any shading eye drawing tutorial. Take your time. Blend slowly. It is better to build up layers than to press hard and create dark, unerasable lines.
Step 3: Build Depth in the Pupil and Lens
The pupil is the darkest part of the eye, but it should not be a solid black blob. If you fill it in with pure black, it looks dead. Instead, use a dark pencil (4B or 6B) to fill the pupil, then go back with a harder pencil (H or 2H) to add tiny radial lines from the pupil into the iris. Those lines mimic the muscle fibers of the iris and give texture. For the lens itself, look at the edge of the iris where it meets the white of the eye (sclera). There is often a subtle shadow there because the lens casts a tiny shadow onto the sclera.
I also add a faint crescent shadow on the opposite side of the highlight. For example, if the highlight is at the top left, the lens shadow will be a soft gray
#realisticeyedrawing #eyedrawingtutorial #howtodraweyes #drawingtips #eyelensdrawing
Leave a Comment